Individual Development Plan (IDP)
This is a training plan aimed at improving skills, which reflects the main activities aimed at the career, personal and professional development of an employee necessary for an occupied or promising position in the company.
The functionality allows:
View the level of your skills and their compliance with the requirements of your position;
Choose the desired position for yourself, view the skills required for the selected position and independently form a development plan;
Form and coordinate development plans for subordinate employees;
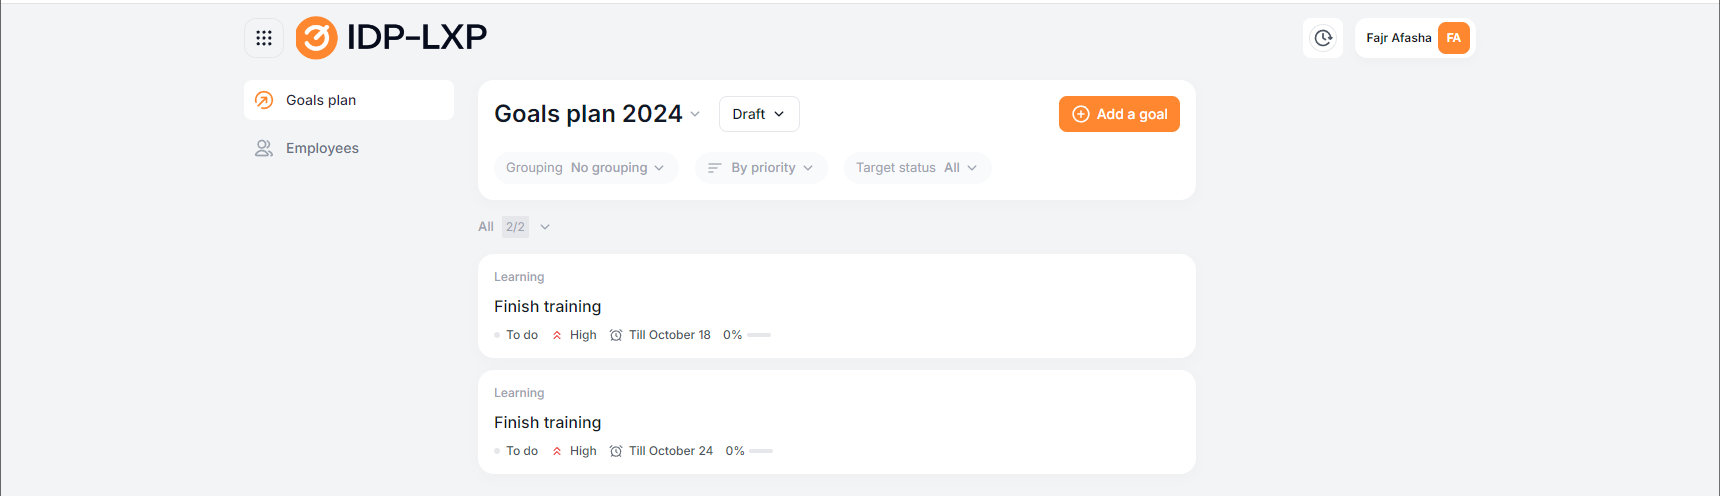
In the "Development Plan" tab, all individual development plans available to the authorized user are displayed. Here, an employee can view and manage their personal development plan. Most often, the plan is formed by the employee himself, together with his supervisor and HR specialist.
In the upper right corner is displayed:
User information.
Setting up notifications- allows the user to set up a set of notifications that will be sent to his email. Alerts can be linked to events in the system and regular, not linked to events. Read more in the article: Setting up alerts.
Go to the admin panel - only a user with the administrator role has it.
Goals are divided by year (you can store the goals of the previous year) and are divided into 2 tabs:
Active - goals in the status "To be completed", "In progress".
Completed - archive, with the status "Completed", "canceled".
Sorting of goals is available: by priority, by deadline, new first, old first.
Adding and editing goals
Goal creation form (fields marked with * are required):
Name – the name of the goal;
Description – a detailed description of the goal, revealing the details and details of the goal for the employee;
Complete before the date – the deadline for completing the goal (by default, December 31 of the current year).There is no way to select a date earlier than the current day.
"Priority" – execution priority level for the employee: "High", "Medium", "Low".
Skills for development – adding skills. They can be set to the required level at the stage of implementation of the IDP.
Materials for studying – adding materials. There may or may not be paid ones. After adding the material, editing of the justification for the material is available. Clicking on the "Justify" button displays a window with an input field for why you need to study this material. If the material is paid, then adding a justification is mandatory. After adding a justification, the "Justify" button changes to "Justified".
Skills and materials are a reference book that is generated in the IDP module or downloaded from an external system. When skills are added, all materials related to these skills are automatically added.
3 cases of goal creation:
1. A goal without skills and without materials.
For example, the goal is to perform a KPI - name, description - information about this KPI. Next, we specify by which date the goal must be completed and its priority.
2. The goal is without skills, but with materials.
For example, the goal is to speak at a sales promotion event - title. Description of this event. Next, we specify by which date the goal must be completed and its priority. And we add materials to gain knowledge and prepare for the fulfillment of this goal (select from the catalog or add manually).
3. Target with skills and materials.
For example, the goal is to study effective communication techniques - name. General description of these materials. Next, we specify by what date the goal must be completed and its priority. Adding skills. The skill can be specified, in addition to the name - the required level - these data are filled in at the stage of implementing the IDP in the company. And the user's current level will be updated and displayed as they study the materials.
And we add materials from the catalog or manually add Materials that can be paid and not. When selecting materials, the justify field appears - this is a form to answer the question - why do you need this material?

Editing or deleting a target is performed by clicking on the target. > The upper right corner is a colon. edit or delete. After making changes, click the save button.
Important: Depending on the user's role, they may have different permissions to create, edit, and delete goals. If any of these actions are prohibited, the corresponding buttons in the interface are not displayed.

Approval of the development plan
After the employee's individual plan is formed, it must be agreed upon to confirm the correctness of the planned plan.
Most often, the plan is sent by the employee himself when ready. Supervision is carried out on the part of the manager and HR to ensure that the courses and skills chosen by the employee correspond to the goals and course of the company. At the same time, managers can provide additional confirmation for the passage of paid courses.
Next to the name of the IDP, a button for approval options is displayed "Approve" | "Approve" | "Under revision". Clicking on it opens the stage editing window
Route formation when sending for approval:
It is possible to add stages and matching elements.
Stage – may contain several matching elements. The approving is the selected user who will participate in the approval.
Specify "Stage name"
"The first reviewer agrees" – the stage is considered completed if any of the reviewers agreed on the stage;
"All participants agree" – the stage is considered completed if all the added concordants have agreed.
The participants of the agreement:
"Add a participant in the coordination" allows you to select a user who will participate in the coordination:
drag & drop element – allows you to swap participants by pressing and holding the mouse button while dragging above/below;
drop-down list of users;
"Delete" – deletes a participant by clicking on the "urn" opposite the corresponding participant.
After adding a participant, a button appears below it to add the next participant to the agreement.
You can also leave a comment for the matching in the appropriate field. The review of the comment is available in the approval history.
By clicking on the "Send" button, the system loads the route defined for this company by default.
A route is a set of stages and concordants arranged in a sequence.
By clicking on the edit button in the header of the form, the approval stages card changes to an editable view. It becomes possible to edit and delete matching elements and stages.
Clicking on the "Cancel approval" button appears; the window "Exactly cancel the approval?" with two buttons "Yes, cancel" and "No, I've changed my mind." By clicking on "Yes, cancel" – cancel the agreement. At the same time, the status of the IDP changes to "Requires improvement". By clicking on "No, I changed my mind" – the window closes and no action takes place. Only the user who sent the route for approval can cancel it. In this case, the "Canceled" stage and the "Renegotiate" button will be displayed in the approval history. Clicking on it opens the form for editing the approval stages.
After successful submission for approval, the status of the IDP will automatically change to "Approval".
The approval history is displayed:
After the user has sent the IDP for approval, this employee will be displayed in the "" tab Require action" in the employee list. When viewing the approval route, two buttons "Submit for revision" and "" will be displayed at the bottom Coordinate". By clicking on "Submit for revision", the approval is canceled and the "Renegotiate" button appears. By clicking on the "Agree" button, the stage "IDP agreed" will be displayed in the history.
Important: Depending on the user's role, they may have different permissions to add additional stages and approvals when submitting for approval. If any of these actions are prohibited, the corresponding buttons in the interface are not displayed.