Before adding materials, read the article:
1. Requirements for downloadable content
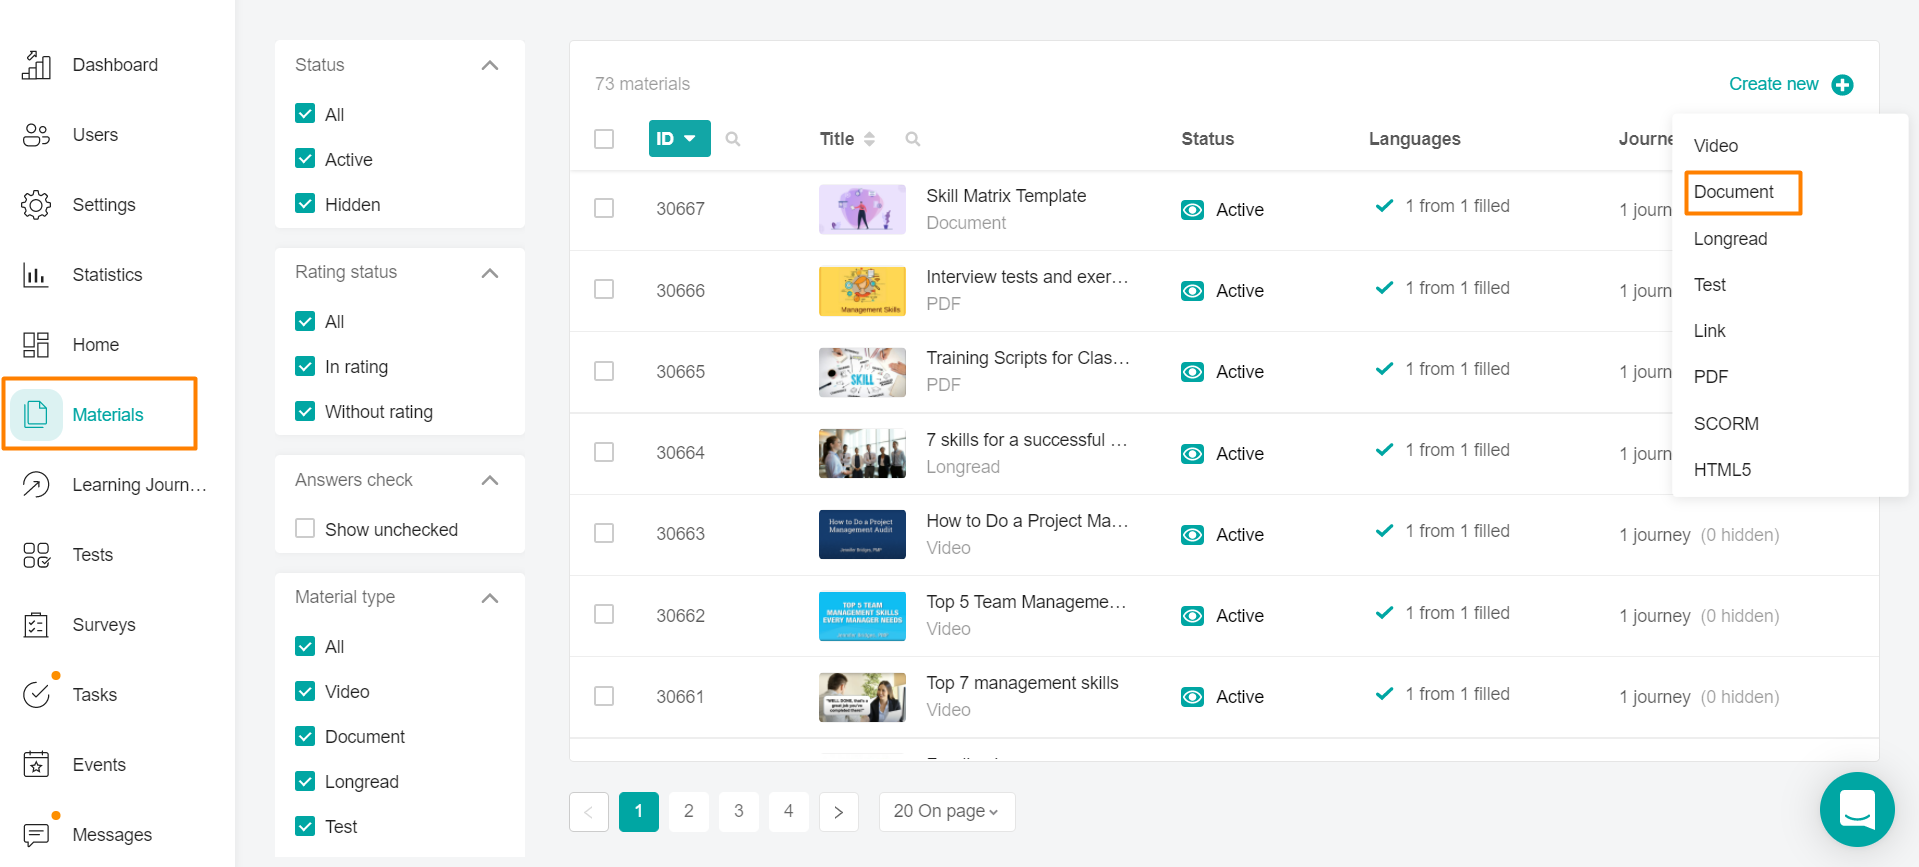
In the "Materials" section, click on the Create New button + select a Document from the drop-down menu.
Fill in the material settings.
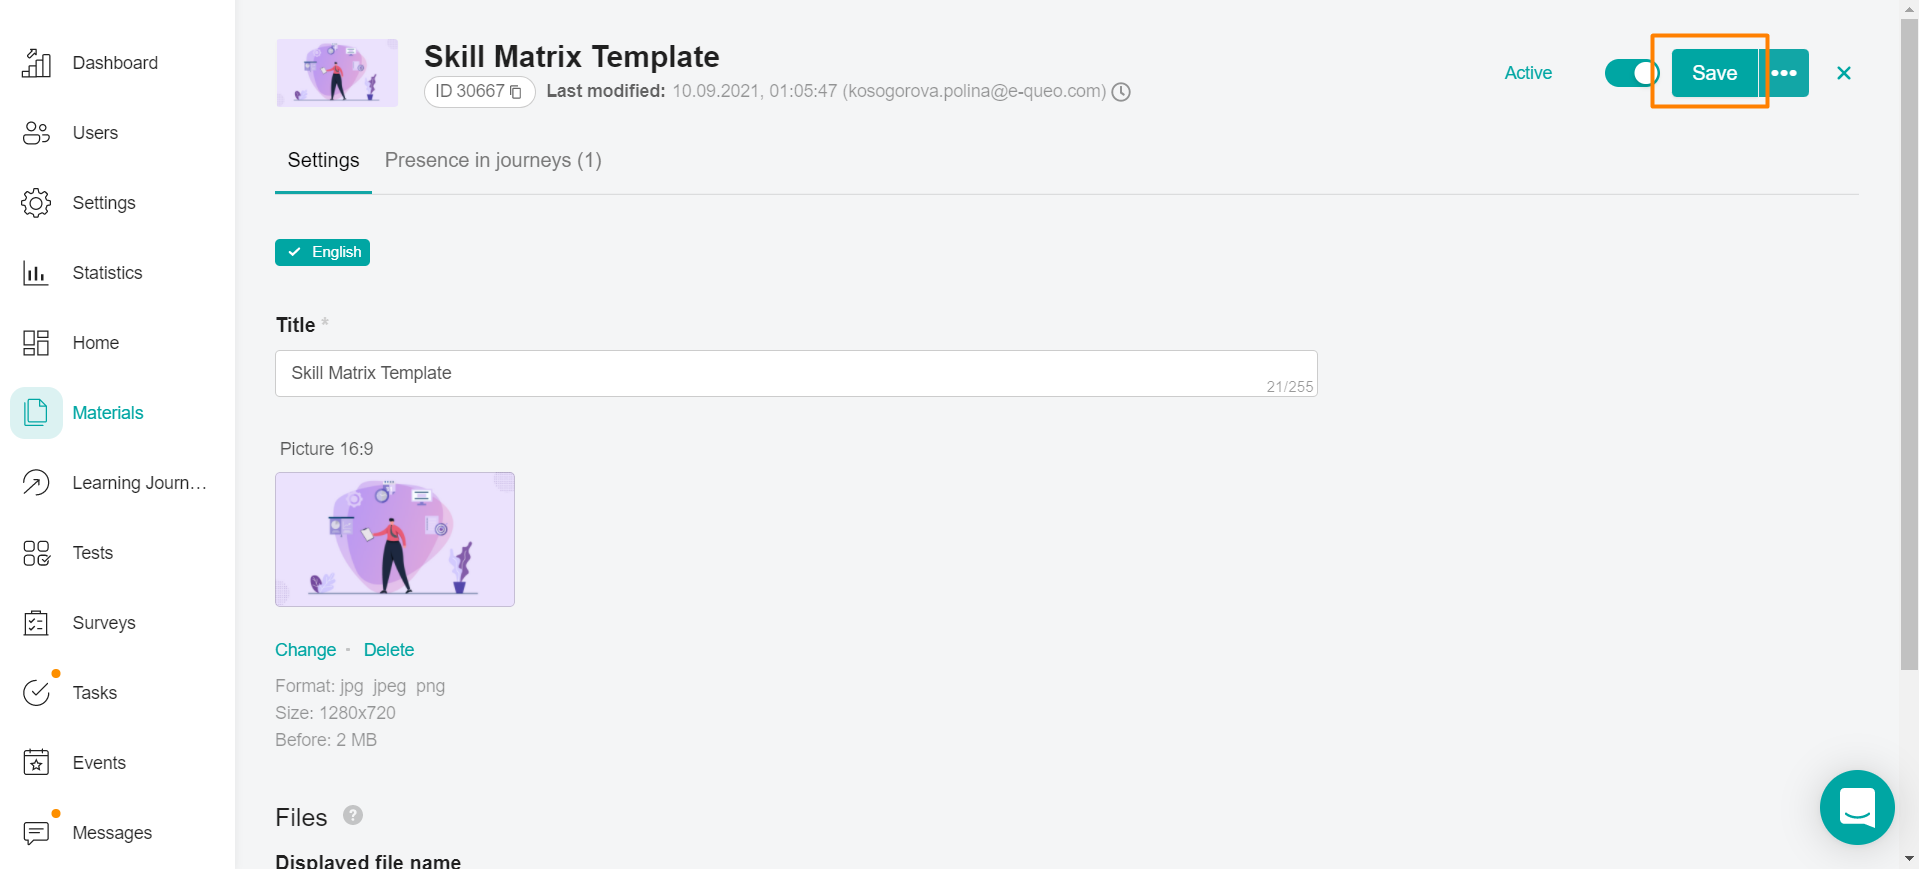
Enter the name of the current document.
Add a cover Image 1280x720.
Click on the Select File button and add the Format: pdf, txt, doc, docx, xls, xlsx, ppt, pps, pptx, ppsx, jpg, jpeg, png ( it is a file, not an archive). After downloading the file, two buttons Edit and Delete appear. You can replace the file with another one or delete it by clicking on the appropriate buttons.
Allow users to share content - Users will always be able to download this type of content.
Suggested Study Time - Here you can schedule time to complete the material. The specified duration does not limit the user in the time of studying the material, but only gives a recommendation.
Auto-assignment of points
● A fixed number of points is given to the user if the material goes into the "passed" status. The administrator sets up the number on his own - how many points each user will receive when the material is completed by him.
By clicking on "View transactions", the administrator will be able to see the details of the assignment of points for this material.Click on the Save button to save the entered data.
If you do not have enough information, then please give feedback on the link: Suggestions for improving articles.
We are waiting for your requests.
Have a great day!